
Online security is increasingly important for businesses of all sizes. And one of the most basic forms of online security is the migration to HTTPS hosting.
It is obvious that there are many factors to consider, but apart from the benefits of a secure website for its visitors, switching to secure HTTPS hosting (rather than HTTP) is beneficial to the business. Along with the security it provides to its visitors, HTTPS is actually a proven Google ranking factor.
If you collect confidential information on your website (including email and password), you must be secure. One of the best ways to do this is to enable HTTPS (also known as SSL (Secure Socket Layer)) so that all information sent to and from your server is automatically encrypted. This prevents hackers from spying on the confidential information of their visitors when they are transmitted over the Internet. Your visitors feel safer on your site when they see the lock while accessing their website knowledgeable that they are protected by a security certificate.
The best thing about SSL is that it is easy to configure. Once this is done, all you need to do is instruct users to use HTTPS instead of HTTP. If you try to access your website by placing https: // in front of your URLs, an error message will appear. This is because you do not have an SSL certificate installed.
However, if you are not prepared or unfamiliar with this technology, all you have to do is complete the following steps to ensure that your site migrates safely and with minimal impact.
- Host with a dedicated IP address
To ensure the best possible security, SSL certificates require their own dedicated IP address for your website. Many smaller web hosting plans use a shared IP address where multiple other sites share the same location. With a dedicated IP, you ensure that traffic to this IP address is directed only to your website and to no one else.
If you do not have a plan with a dedicated IP address, you can ask your current web host to update your account to a dedicated IP address. There will probably be a charge – once or a one-month rate.
- Buy a Certificate
Next, you need something to prove that your website is your website, a type of ID card for your website. This is achieved by creating an SSL certificate. A certificate is simply a paragraph of letters and numbers that only your site knows, such as a really long password. When users visit your website through HTTPS, this password is checked. If it matches, it automatically checks if your site is what you say it is and everything that comes to your site is encrypted.
Technically, you can do it yourself (called “self-signed certificate”), but all major browsers use “Certification Authorities (CA’s)” who also have a copy of this long password and can answer for you. To be recognized by these authorities, you must obtain a certificate from them.
- Activate the certificate
Note: Your web hosting provider can do this for you, ask before continuing. This can be complicated and if you can wait 1-2 days, it may be better to let them do it.
If you activate the certificate yourself, you must generate a CSR in the next step. The easiest way to do this is in the web hosting control panel such as WHM or cPanel. Switch to the SSL / TLS administration panel and select “Generate an SSL certificate and signing request”. Complete the fields on the following screen:
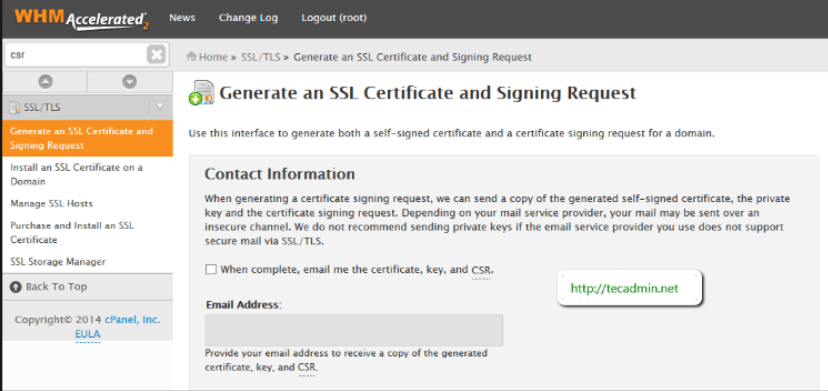
“Host for make cert for” is your domain name and the contact email may be blank. When you have completed it, you will see a screen like this:
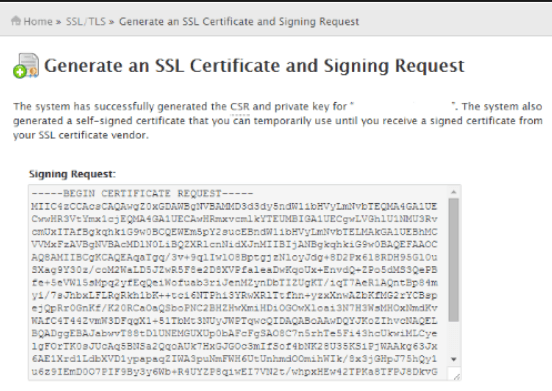
Copy the first block of text. You need this “CSR” to deliver it to the SSL certificate issuer so they can determine your identity. Log in to your Truehost account (or wherever you have purchased your certificate) and activate it. Paste your CSR and any other required field. You will be asked for an approval email. This is an email address that shows that you own the domain, e.g. postmate@domain.com. If it does not exist, you must create it to receive the email with the final certificate. Follow the steps and, when finished, the email address should have received the certificate as a .crt file.
- Install the certificate
Note: This step can also be performed by your web host for you. Contact them before proceeding. This can be complicated and if you can wait 1-2 days, it may be better to let them do it.
If you install the certificate yourself, this is the easiest step you will take. You have the certificate in your hand and simply paste it into the control panel of your web host. If you use WHM CPanel, click on “Install an SSL certificate” in the SSL / TLS menu.
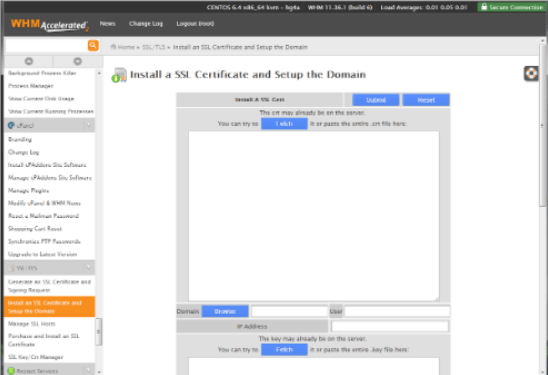
Paste it in the first field and click “Send.” That’s it. Now try to access your website through https://www.domain.com – you should be secure!
- Update your site to use HTTPS
If you go to https://yoursite.com at this time, you should see that it is loaded. Congratulations, you have successfully installed SSL and enabled the HTTPS protocol! Your visitors are not yet protected. You must ensure that they access your website through HTTPS.
Keep in mind that you usually only have to protect some pages, for example, your login or your shopping cart. Enabling HTTPS on pages where the user does not send confidential information will only waste encryption processing and slow down the experience. Identify target pages and perform one of the following two methods.
You can update all links to target pages to use HTTPS links. In other words, if your home page has a link to your cart, please update this link to use the secure link. Do this for all links on all pages that point to sensitive URLs.
Tips
- Understand that HTTPS does not mean that the information on your server is secure. It only protects the transmission of data from your visitor’s computer to yours and vice versa. Once the confidential data is on your server, you must protect it (encrypt it in the database, etc.).
- Some people only look for a lock on the page, not in the browser. After installing SSL, you may want to add a lock icon to your pages to inform them that it is safe not to look in the URL bar.
Summary
What makes a website safe? A security certificate correctly installed.
Having successfully protected your site by installing an SSL certificate and made your visitors less vulnerable to attacks makes it a relief. You can rest easy when you know that all the information you send on your website is encrypted and is safe from hackers.